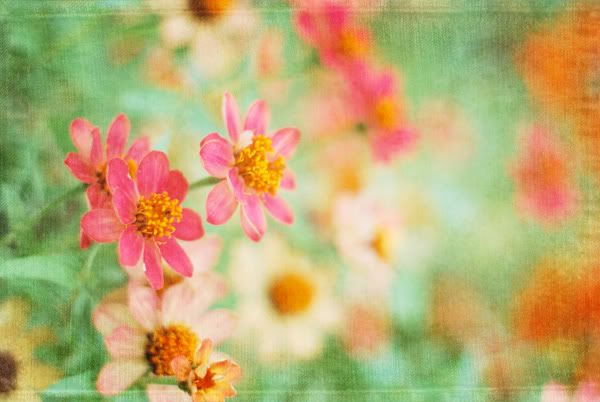
I am just having so much fun making these wintery magic textures! I have 2 more to share with you, Jack Frost, and Iced Over. As with most "Magic" textures, these will give the best effect when used in screen blend mode. Click on the images to go to my Zenfolio site where you can download them for free using the password "SiennaFreebie"
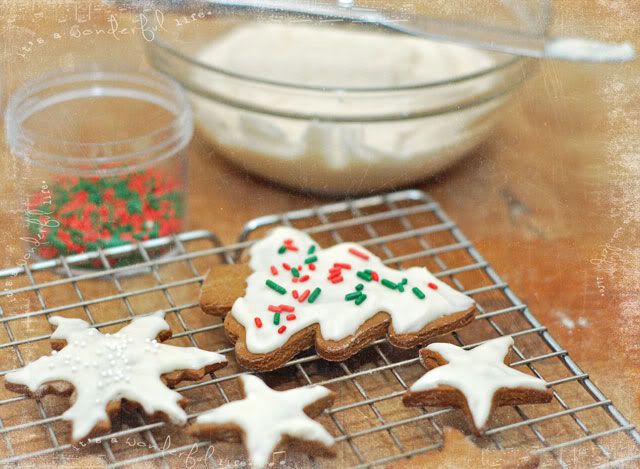
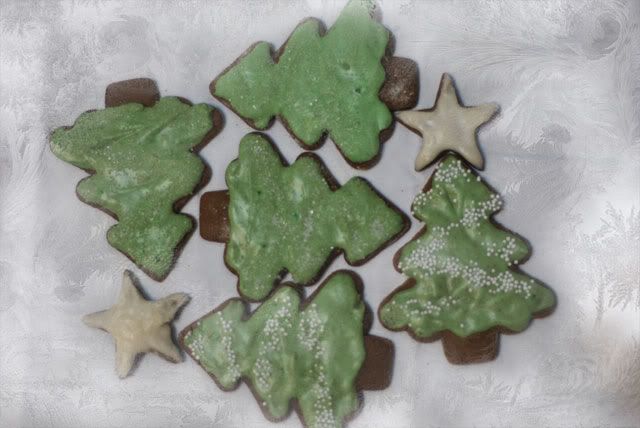
I used "Iced Over" in this picture of my Gingerbread Christmas Trees...and "iced-over" they are :) Check out my previous post for the recipe for these yummy cookies.
Monday, December 19, 2011
Sunday, December 18, 2011
Gingerbread Cookies
If I ever ask my family what kind of cookies they would like me to bake, the answer is always the same. "Can you please make your gingerbread cookies"? I have been making these ever since my kids were toddlers. They are in college now and still ask for gingerbread cookies. Holidays just wouldn't be the same without them.
Making these cookies is usually a multi-day event for me.
Day 1 I make the cookie dough and chill it in the fridge.
Day 2 I roll out the dough, cut the cookies, and bake them.
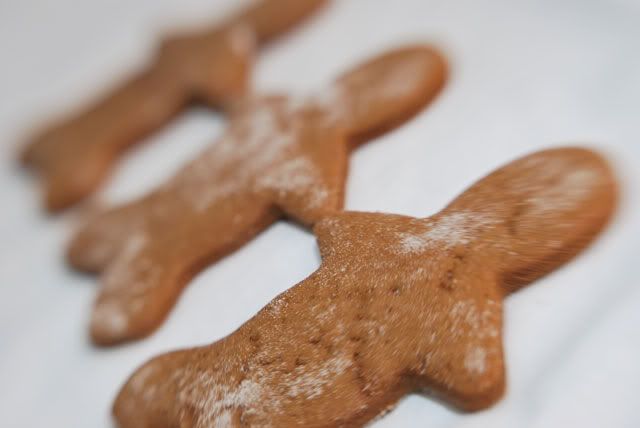
One of my favorite memories making these cookies was when my youngest son was 2 years old. He was helping me decorate the cookies. After some time he piped up, all excited, "Look mommy, he has a wee wee!". Sure enough, I look over and he has created an anatomically correct gingerbread man. Kids do the darndest things! It was all I could do to keep a straight face.
If you want to make these yummy cookies, here is the recipe I use:
Gingerbread Cookies
3/4 cup sugar
1/2 cup unsalted butter, softened
3/4 cup molasses
1/2 cup buttermilk
4 cups flour
1 teaspoon baking soda
3/4 teaspoon salt
1/2 teaspoon baking powder
2 teaspoons ginger
Cream sugar and butter in mixing bowl. Beat in molasses and buttermilk. Stir in remaining ingredients until well mixed. Chill several hours or overnight. Preheat oven to 400°F. Roll out 1/3 of the dough at a time on a floured surface to 1/4-inch thickness. Cut into desired shapes with floured cookie cutter. Place 1 inch apart on lightly greased baking sheets. Bake 7 to 10 minutes or until edges are set. Decorate with Spiced Vanilla Icing.
Spiced Vanilla Icing
Corrected
4 cups powdered sugar
2 teaspoons vanilla
4 tablespoons unsalted butter, softened
6 to 8 tablespoons light cream or Milk
1/4 teaspoon Cloves (optional)
1/2 teaspoon Nutmeg (optional)
1/2 teaspoon Ginger (optional)
1 teaspoon Cinnamon (optional)
Food Coloring (optional)
Combine powdered sugar, vanilla, butter and enough cream until it has a very soft, spreadable consistency. Use it just like this if you want to decorate white cookies. Add all or any combination of the cloves, nutmeg, ginger and cinnamon to make a delicious spiced icing. Separate it into different bowls and add food coloring if desired.
I doubled the icing recipe since I usually need at least 2 batches to decorate the cookies; however, I originally forgot to double some of the ingredients. That has been corrected. Sorry about that!
Happy Baking!!
Some of these images have been processed using Kim Klassen's Day 6 and Day 7 magic textures. Many thanks to Kim for hosting her 12 days of textures!
Making these cookies is usually a multi-day event for me.
Day 1 I make the cookie dough and chill it in the fridge.
Day 2 I roll out the dough, cut the cookies, and bake them.
One of my favorite memories making these cookies was when my youngest son was 2 years old. He was helping me decorate the cookies. After some time he piped up, all excited, "Look mommy, he has a wee wee!". Sure enough, I look over and he has created an anatomically correct gingerbread man. Kids do the darndest things! It was all I could do to keep a straight face.
If you want to make these yummy cookies, here is the recipe I use:
3/4 cup sugar
1/2 cup unsalted butter, softened
3/4 cup molasses
1/2 cup buttermilk
4 cups flour
1 teaspoon baking soda
3/4 teaspoon salt
1/2 teaspoon baking powder
2 teaspoons ginger
Cream sugar and butter in mixing bowl. Beat in molasses and buttermilk. Stir in remaining ingredients until well mixed. Chill several hours or overnight. Preheat oven to 400°F. Roll out 1/3 of the dough at a time on a floured surface to 1/4-inch thickness. Cut into desired shapes with floured cookie cutter. Place 1 inch apart on lightly greased baking sheets. Bake 7 to 10 minutes or until edges are set. Decorate with Spiced Vanilla Icing.
Corrected
4 cups powdered sugar
2 teaspoons vanilla
4 tablespoons unsalted butter, softened
6 to 8 tablespoons light cream or Milk
1/4 teaspoon Cloves (optional)
1/2 teaspoon Nutmeg (optional)
1/2 teaspoon Ginger (optional)
1 teaspoon Cinnamon (optional)
Food Coloring (optional)
Combine powdered sugar, vanilla, butter and enough cream until it has a very soft, spreadable consistency. Use it just like this if you want to decorate white cookies. Add all or any combination of the cloves, nutmeg, ginger and cinnamon to make a delicious spiced icing. Separate it into different bowls and add food coloring if desired.
I doubled the icing recipe since I usually need at least 2 batches to decorate the cookies; however, I originally forgot to double some of the ingredients. That has been corrected. Sorry about that!
Happy Baking!!
Some of these images have been processed using Kim Klassen's Day 6 and Day 7 magic textures. Many thanks to Kim for hosting her 12 days of textures!
Saturday, December 17, 2011
Day 5 - Kim Klassen's 12 Days of Textures
I hope you are doing well this fine Saturday morning. I have been thoroughly enjoying Kim Klassen's 12 Days of Textures. If you have not yet done so I encourage you to check it out.I have been playing around with Kim's Day 5 texture, "ZuZu" and I came up with 2 different versions of this Frosted Pine image. I couldn't decide which one I liked better so I decided to post both. I hope you like :)
Recipe:
1 layer of kk_zuzu, multiply, 36%
1 layer of kk_anabelle, soft light, 100%, Slightly desaturated the outer edges
Recipe:
1 layer of kk_zuzu, multiply, 36%
1 layer of kk_anabelle, soft light, 100%, Slightly desaturated the outer edges
Thursday, December 15, 2011
Day 4 - Kim Klassen's 12 Days of Textures
Wednesday, December 14, 2011
Day 3 - Kim Klassen's 12 Days of Textures
I took this picture at the Fort Worth Botanical Garden a couple of summers ago. I loved the way the flowering plant framed this Ruby-throated Hummingbird. I thought this would be a good candidate for Kim's new Cosmos texture. It really makes the silhouette of the bird stand out and it gives a feeling of air movement. The recipe:
1 layer of Kim's "Cosmos" texture using the Overlay blend mode at 100%
1 Layer of my own "Dirty Chalkboard" texture using the Soft Light blend mode at 100%
1 layer of Kim's "Cosmos" texture using the Overlay blend mode at 100%
1 Layer of my own "Dirty Chalkboard" texture using the Soft Light blend mode at 100%
Day 2 - Kim Klassen's 12 Days of Textures
Day 2 of Kim Klassen's 12 Days of Textures features her new Anabelle texture. The recipe for my raspberry picture below is:
1 layer of Thursday in soft light blend mode at 100%
1 layer of Crackerjack in soft light blend mode at 91%
1 layer of Anabelle, converted to grey scale, inverted, screen blend mode at 100%
1 layer of Thursday in soft light blend mode at 100%
1 layer of Crackerjack in soft light blend mode at 91%
1 layer of Anabelle, converted to grey scale, inverted, screen blend mode at 100%
Monday, December 12, 2011
Day 1 - Kim Klassen's 12 Days of Textures
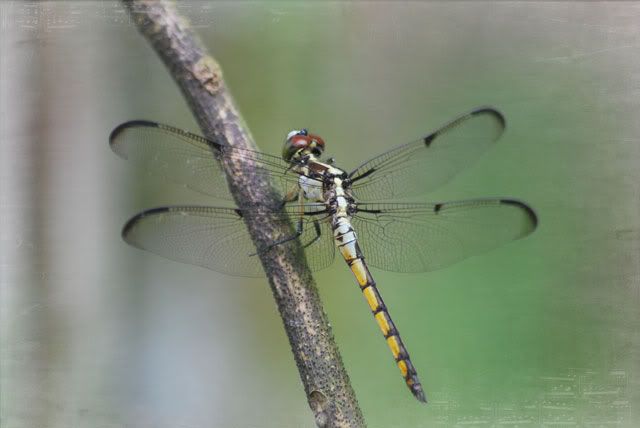
What an exciting idea! Starting today, Kim will be sharing a new texture each day for 12 days over at the Kim Klassen Cafe. Today's beautiful texture is "Lilly". Here I converted the texture to grey scale, inverted it, and applied a layer to my dragonfly shot in Screen Blend mode at 56% opacity for some dreamy musical edges.
Thank you Kim!
Thank you Kim!
Saturday, December 10, 2011
A Holiday Mood
Today will be a day of holiday decorating, shopping, baking cookies, and later visiting with friends. I love the hustle and bustle of the holiday season...especially when I am not stressing out about work.
I hope you are all enjoying a wonderful holiday season so far!
I processed this image using my Soft Grunge texture (shared over on my Flickr Site) and one of my new holiday textures, "Winter Wonderland". Check out my previous post if you are interested in downloading my freebie holiday textures.
Have a great Saturday!!
Thursday, December 8, 2011
A Couple of Fun Winter Texture Freebies
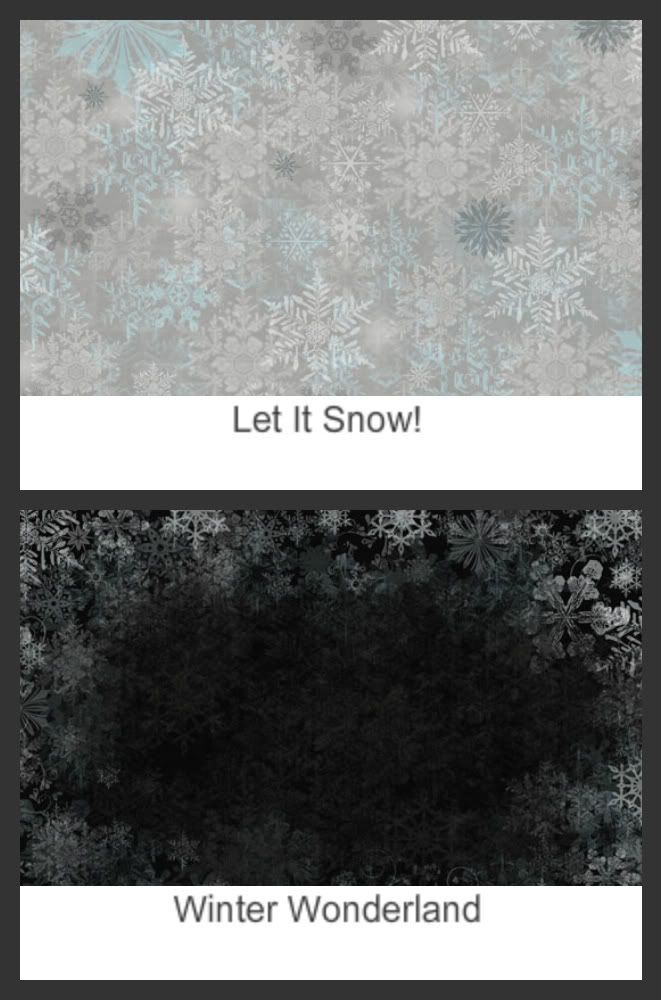
I have a couple of new textures to share with you, "Let It Snow!" and "Winter Wonderland", which works well using a screen blend mode. I think these have some fun possibilities! Click the image below to go to the site where you can download these textures for free using the password "SiennaFreebie".
Have fun! :)
Have fun! :)
Tuesday, December 6, 2011
Celebrating the Beauty of Nature in Winter
This week's theme in Kim Klassen's Texture Tuesday is "Celebrate". Some of us are already experiencing winter...even though winter is still 2 weeks away. Winter brings a special beauty all of its own. Take a moment to notice those little winter birds flitting through the trees, and foraging on the ground, the beauty of the frost on the leaves or lingering flowers, the peaceful beauty of a snowy landscapes. Lets "celebrate" the beauty of nature in winter.
I processed this image using a very subtle layer of Kim Klassen's "KK_LovinLayers" texture, with a darken blend mode at 25% opacity to give a little atmosphere.
Happy Texture Tuesday! :)
I processed this image using a very subtle layer of Kim Klassen's "KK_LovinLayers" texture, with a darken blend mode at 25% opacity to give a little atmosphere.
Happy Texture Tuesday! :)
Friday, December 2, 2011
Experimenting with RadLab
In Photo Art Friday, the theme is to work with a tool, method or style that we have been wanting to try. I have been seeing some buzz around about RadLab and I wanted to give it a try. I downloaded the free 30-day trial and discovered that the tool has a nice interface allowing you to see the results of different filters on your image, with different options on how to display the filter results. The tool has a nice plug-in for Photoshop or Photoshop Elements, which allows you to add a RadLab layer, with your filter selections. You can set the opacity for your RadLab layer just like you can any layer. I was excited to see the number of filters you can choose from, some affect color, some affect sharpness, some are different variations of monochrome. It is similar in a way to the things you can do with Adobe Lightroom pre-sets. I'm not sure if you can create your own RadLab filters the way you can create your own Lightroom pre-sets, but I found it to be very powerful and convenient.
In my image below, I played around with several RadLab filters and topped it off with the Pixel Dust, "pdpa Linen Blind" texture. I LOVE this texture!! Thank you Bonnie for sharing it!
Wednesday, November 30, 2011
Autumn Lingers and New Texture
I walked outside today and marveled at this golden chinkapin oak in my front yard. With the nights getting colder and colder, I know this beauty is short-lived so I am going to enjoy it while autumn lingers.
I love the amazing colors of this capture without texture, but I also love the dreaminess the texture adds, symbolizing the fading of autumn. Hover over with your mouse to see without texture.
I processed this image using my latest texture, shown later in this post. I call this one "Dirty Chalkboard". Although the texture itself does somewhat resemble a dirty chalkboard, I think it adds some nice soft brushed edges to photographs. Here I used the screen blend mode at %56.
This image was shared at:
and
Click the texture below to go to the page where you can download the high resolution texture. For a limited time, you can download it for free, using the password "SiennaFreebie". As a bonus, you will also find "Dirty Chalkboard Cool" over there, which you can download using the same password. I hope you like :)
Monday, November 28, 2011
Gratitude
Gratitude is this week's Texture Tuesday Theme, and what better way to wrap up a month of Thanksgiving then reflecting on thoughts of Gratitude.
Be Thankful For...
by Author Unknown
Be thankful that you don't already have everything you desire,
If you did, what would there be to look forward to?
Be thankful when you don't know something
For it gives you the opportunity to learn.
Be thankful for the difficult times.
During those times you grow.
Be thankful for your limitations
Because they give you opportunities for improvement.
Be thankful for each new challenge
Because it will build your strength and character.
Be thankful for your mistakes
They will teach you valuable lessons.
Be thankful when you're tired and weary
Because it means you've made a difference.
It is easy to be thankful for the good things.
A life of rich fulfillment comes to those who are
also thankful for the setbacks.
GRATITUDE can turn a negative into a positive.
Find a way to be thankful for your troubles
and they can become your blessings.
Copyright© InspirationalWordsOfWisdom.com 2007-2011
Here I added 1 layer of kk_MusicLovin, multiply @ 64%; 1 layer of kk_paper2, overlay @ 67%; and I topped it off with a little "Gratitude" script.
Happy Texture Tuesday! :)
Tuesday, November 22, 2011
Happy Texture Tuesday!
Sunday, November 20, 2011
A Week of Thanksgiving
This week we will be celebrating the American Thanksgiving holiday. It is a time to reflect upon the things we are thankful for and a time to enjoy the company of family. My youngest son will sadly not be spending Thanksgiving with us this year as he is studying abroad on a youth exchange program. I am, however, looking forward to having my 2 oldest sons home for the holiday as well as my in-laws. I am looking forward to the hustle and bustle in the kitchen, lingering over delicious meals while listening to stories of their adventures, as well as our lively Scrabble tournaments. I am thankful for my amazing family!
I will share these textures with you soon :-)
Happy Sunday!
This image started off little under-exposed, but I loved the leaves and potential it had. I tweaked it using some RadLab filters, and then played around with a couple of new textures I have been working on (and continue to work on), "Sienna Grain" and "Sienna Magic". I liked the bold, almost abstract result the textures added.
I will share these textures with you soon :-)
Happy Sunday!
Thursday, November 17, 2011
How to Display your Flickr Photos on Your Blog
I have been using Kim Klassen's wonderful instructions to use the mouse-over technique, but I have been wanting to use my Flickr Photos instead of having to store my pictures on a different account in order to have a URL to use in the mouse-over code. It is not obvious where to grab the URL from your Flickr photo page but I finally figured it out and I wanted to share it with you here in case you've been struggling with the same dilemma.
First Open your picture and select the "Share" pull-down menu above your picture, then select the "Grab the HTML/BBC Code" menu item. Select the "HTML" radial button below the code box, and select the size of the image that will work for your blog. In my example below, I had already uploaded a re-sized image for my blog, so I selected the "Original" size. Once you do this, you can click in the box with the code and copy it.
You can paste this code as-is if you just want to display the picture on your blog. This code will link back to your picture on your Flickr Photostream if the user clicks on your picture.
If you just want to grab the URL link for your Flickr picture, copy the highlighted excerpt from your code as shown below in my example. This is the URL you would use to paste in your mouse-over code.
If you want to get the code to display this picture on your blog without linking back to your Flickr site, copy the highlighted excerpt from your code as shown below in my example:
Finally, I also discovered that Flickr provides a feature where you can create a blog post directly from your Flickr Photo page for some common blog sites. Simply open your Flickr Photo page, select the "Share" pull-down above your picture. Next, select the "More ways to share" pull-down and if your blog icon is in there select it as shown in example below. It will pop up a window where you can create your blog entry.
I hope this helps! Have a great day! :-)
My Go-To Processing Technique
This week's Photo Art Friday theme over at Pixel Dust Photo Art is to share a piece of photo art that has been made using one of your favorite, "go-to" editing/processing techniques. Well, My absolute favorite editing/processing technique is to apply a texture layer and try different blend modes and opacities until I find what works for my picture. I will repeat this process with different textures until I am satisfied with the results. Here I used pdpa_Soft_Echoes texture in saturation blend mode at 43% opacity and pdpa_Feelings texture in overlay blend mode at 58% opacity. Many thanks to Bonnie over at Pixel Dust Photo Art for sharing these textures!
Monday, November 14, 2011
Late Flowers in Autumn
These beautiful flowers were seen at the Zilker Botanical Garden in Austin, Texas. I love this image both with an without texture. My new favorite lens is my Nikon 50mm f/1.8. It took a little getting used to as it is a manual focus lens on my Nikon D60 camera, but I am starting to love the freedom in composing my images using manual focus, and I love the effects of shallow depth of field I can get with this lens.
This week in Kim Klassen Cafe, the theme for Texture Tuesday is to use at least one layer of her new "Phoebe" texture, which I included in this image using a soft light blend mode at 82% opacity. I also used my new Blue Denim Texture, soft light blend mode, 100% opacity. And finally, a couple of tweaks in RadLab to bring out some of the details. You should be able to hover your mouse over the image and off the image to see the before and after effect.
Happy Texture Tuesday!
I also discovered Photo Tip Tuesday, where I will be sharing this work as well:
Saturday, November 12, 2011
Denim Love Texture Freebies
Liatris in Monochrome
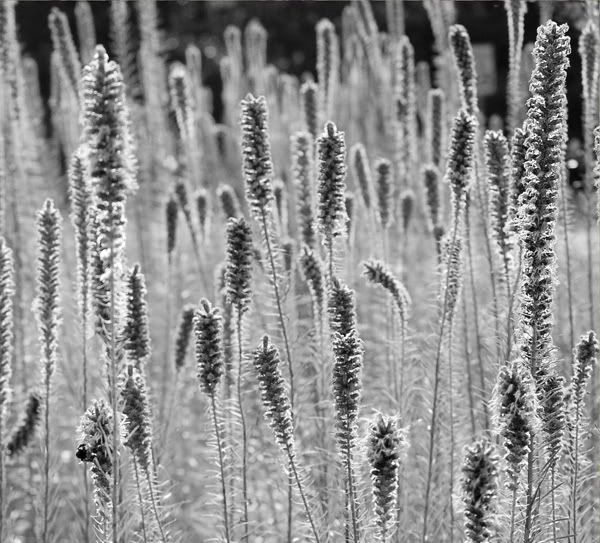
Some images work so well in black & white or selective color. I particularly love those moody, shadowy, impressionistic works. Here is an example of one such type of work: Girl with an Umbrella by ~ania♥'s. Another Example: Lost in KL by M.A.M08. I would love to figure out how to accomplish the effect.
While not in the coveted impressionistic style, my image below is a field of liatris wildflowers seen in eastern Oklahoma. While I do think the image is beautiful in color, I think I like it even more in B&W. I hope you like!
**Shared in The Weekend in Black and White
Happy Saturday :-)
I had to think outside of my box a bit in editing this image and it is one of my favorites, so I decided to share this in the Simplicity Photography Challange this week, featuring the theme "Favorite".
Subscribe to:
Posts (Atom)